Pro Breeze : un humidificateur d'air design et efficace
Pour vivre dans un meilleur environnement, je préfère opter pour des appareils efficaces et élégants. Ainsi, j'ai porté mon choix sur le Pro Breeze, un humidificateur au design compact,…
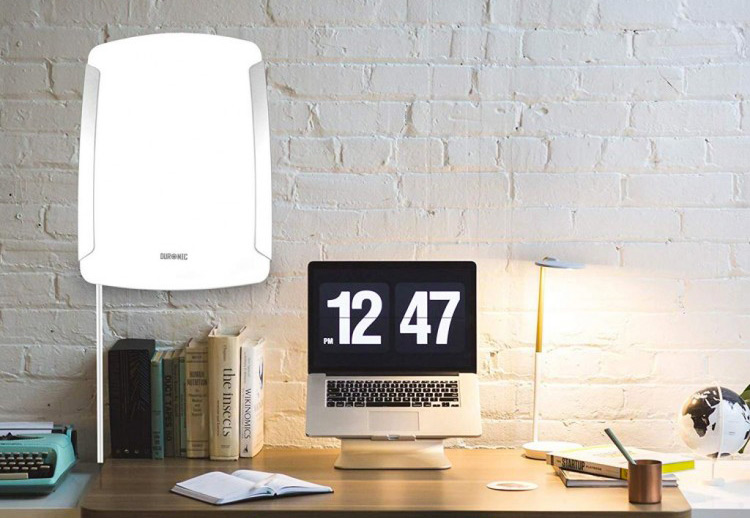
SADV1 de Duronic, une lampe de luminothérapie XXL
En hiver comme en automne, de nombreuses personnes éprouvent une étrange sensation de fatigue et de mal-être. Certains plongent même dans la dépression ou l'anxiété ! J'ai moi-même vécu…

Verdict après 3 semaines d'utilisation du Somneo de Philips
Somneo de Philips est un simulateur d'aube qui m'a réellement impressionné. Les réglages sont dissimulés et la configuration s'effectue via l'écran tactile. Cet écran à rétroéclairage LED…

Les caractéristiques et mon avis sur le fer à lisser vapeur Babyliss Steam pure
La gamme de fer à lisser de la marque Babyliss a été conçue pour un résultat professionnel. Parmi les modèles de cette gamme figure le Babyliss Steam Pure (voir les caractéristiques complètes).…
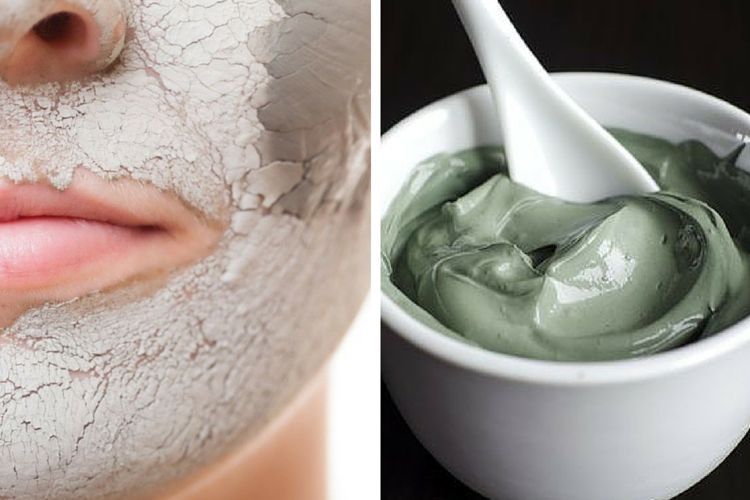
Le masque à base d'argile verte pour lutter contre les problèmes de peau
La peau est l'organe constamment en contact avec l'environnement extérieur. Elle subit donc plusieurs agressions et est facilement sujette à des imperfections. Pour en prendre soin, il…
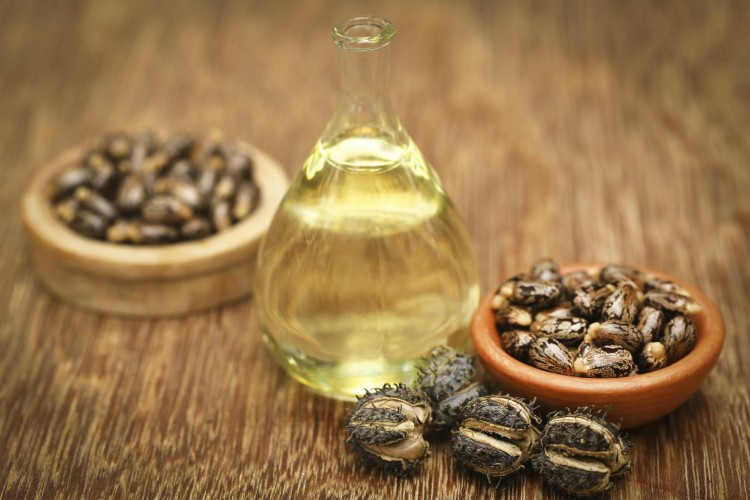
Mes conseils pour faire des masques à base d'huile de ricin
Les masques à base d'huile de ricin offrent de nombreuses vertus sur les cheveux. En effet, l'huile de ricin aide les cheveux à prendre du volume, à briller et à gagner en longueur. De…

Les soins pour lutter contre le vieillissement de la peau
Beaucoup de femmes rêvent d'une jeunesse éternelle qui leur permettrait d'avoir en permanence une peau fraiche et sans rides. Mais ça, c'est un rêve, car tout le monde est appelé à vieillir…
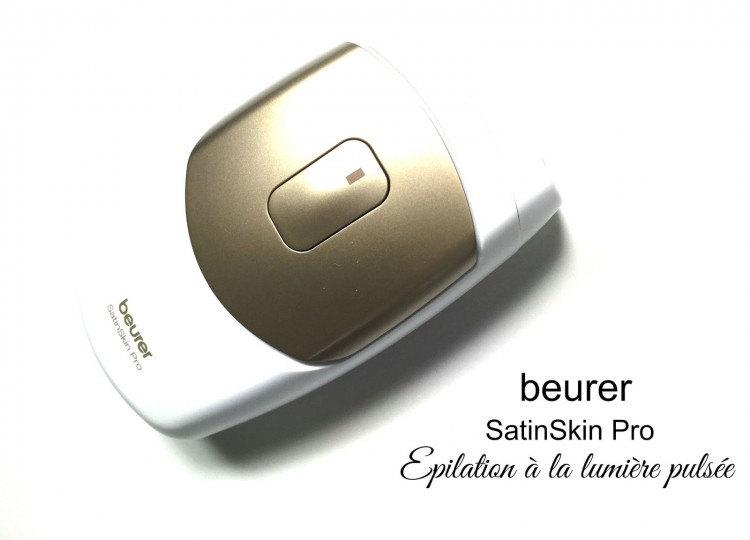
Beurer IPL 7500, un modèle compact pour s'épiler les poils disgracieux
Le modèle IPL 7500 SatinSkin Pro est un épilateur à lumière pulsée fabriqué par Beurer, une marque allemande bien connue dans ce domaine depuis longtemps. Aujourd'hui, je vais vous présenter…
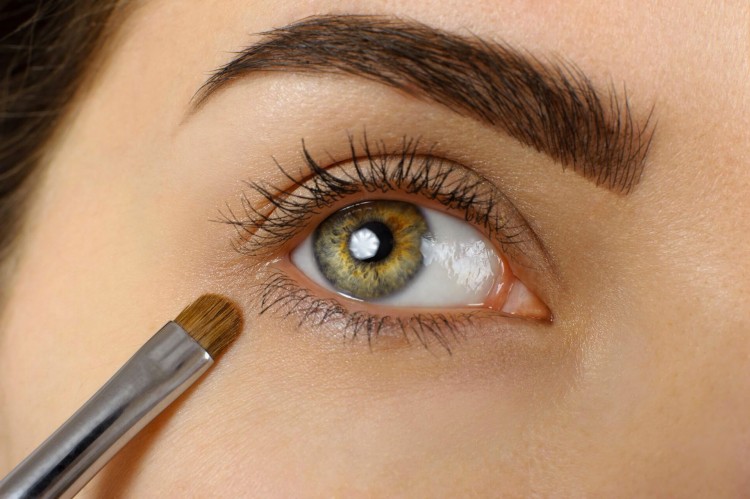
Mes conseils pour bien se maquiller les yeux
Envie de maitriser le maquillage des yeux ? Vous êtes à la bonne adresse ! Voici mes astuces et conseils pour un maquillage des yeux parfait. Idées de maquillage selon la couleur de yeuxL'une…
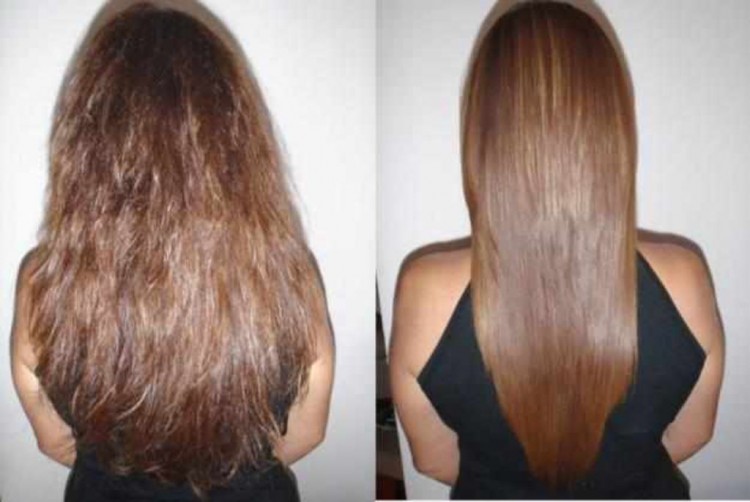
Le lissage brésilien pour avoir de beaux cheveux, quels effets et le prix ?
Le lissage brésilien est un moyen efficace de lisser ses cheveux. Il a pour but de nourrir les cheveux et de les entretenir grâce à la kératine. L'application de cette substance se fait…

Comment séduire un homme quand on est une femme ?
Savoir comment plaire aux hommes, les séduire et comprendre ce qu'ils aiment chez une femme, ce à quoi ils ne peuvent résister et qui les fait fantasmer. C'est ce que nous vous proposons…
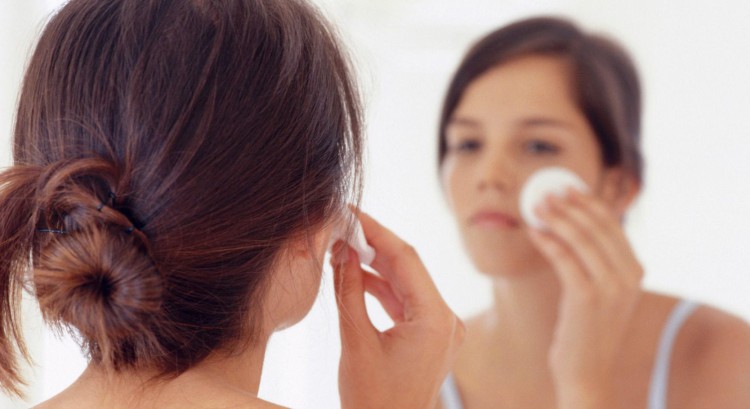
Ma routine démaquillage et layering bio
Ah enfin un article beauté! Ca me manquait et ça fait quelques temps que j'y pensais. Il fallait que je m'y mette avant que mes produis ne soient à moitié vides :)C'est quoi une routine…
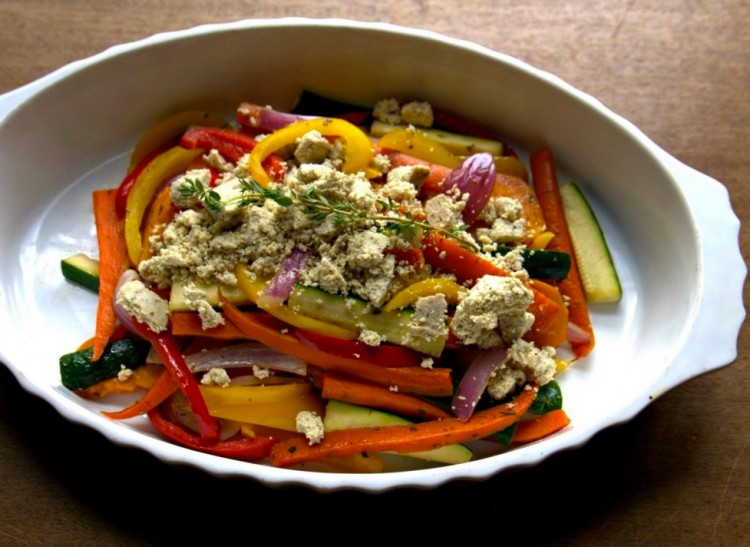
Recette de légumes grillés au feta végétal
Voici une suggestion de recette colorée et facile à préparer, parfaite comme accompagnement.Ingrédients pour environ 4 portions3 carottes1 courgette1 poivron de couleur (j'avais ici deux…